
Generate App ID / App Secret
Create an App ID in the dashboard to authenticate with an App ID and App Secret instead of an API Key.
Dashboard URL
Using API Key and App ID togetherAsleep supports both the API Key method and the App ID / App Secret method. Your existing API Keys keep working, and you can use both methods side by side.
If your account has an API Key, you can also generate an App ID / App Secret.
App Secret Exposure NoticeThe App Secret is shown only once, right after it is created. Once you close the window, you cannot view it again, so store it in a safe place (such as a secrets manager or environment variable) immediately. If you lose it, you must create a new App ID.
Take care that your App Secret is not exposed outside.
What are an App ID and App Secret?
An App ID and App Secret are app credentials you can use instead of an API Key. When you create one in the dashboard by specifying an App name and Scopes, an App ID and App Secret are issued as a pair, and you use them to obtain tokens for authentication.
| Item | API Key | App ID / App Secret |
|---|---|---|
| Credential | API Key | App ID + App Secret |
| Environments | Issued separately for Test and Live | One App ID can request both Live and Test tokens (in the SDK, choose with isTestEnvironment) |
| Auth header | x-api-key | Authorization: Bearer (token, issued and refreshed automatically by the SDK) |
| Viewing the value again | Click the [eye] icon in the list | App ID is shown in the list; App Secret is shown only once when created |
| Permission scope | - | Choose Scopes when creating |
To use the App ID / App Secret in the SDK, see the Token method in the Android SDK and iOS SDK setup documents.
Create an App ID
-
Sign in with an account for which you have completed sign-up.
-
Click the Profile icon in the upper right corner of the dashboard, and then click Settings.
-
In the App ID / App Secret block of the Settings screen, click the [+ Generate] button.
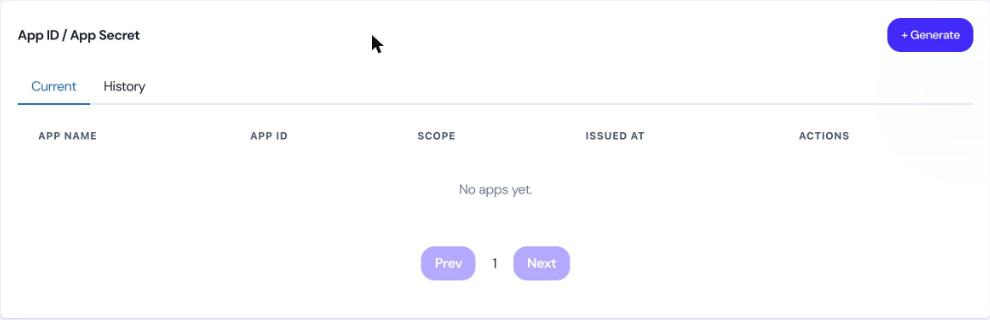
App ID / App Secret block before creation
- In the Create App window, enter an App name, choose Scopes, and click [Create App].
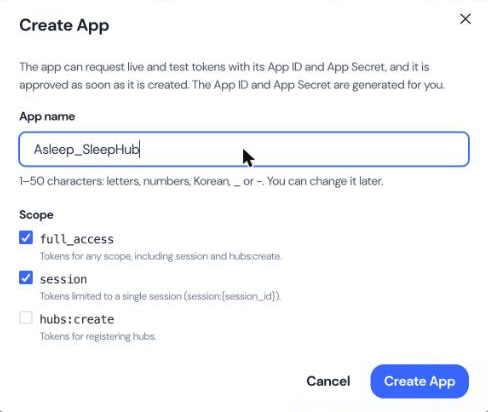
Create App window
- App name: 1–50 characters; Korean, letters, numbers,
_and-only. Spaces are not allowed. You can change the name after creation. - Scope: The permission scope of tokens issued for the App ID. Select at least one.
full_accessandsessionare selected by default.
| Scope | Description |
|---|---|
full_access | Tokens for any scope, including session and hubs:create. |
session | Tokens limited to a single session (session:{session_id}). |
hubs:create | Tokens for registering hubs. |
- In the Your new app credentials window, use the [Copy] buttons to copy the App ID and App Secret and save them. When you are done, click [Done].
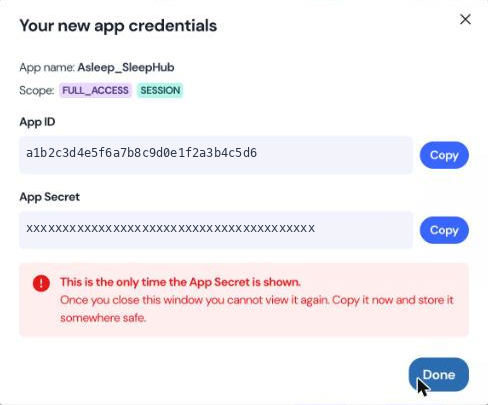
Your new app credentials window
You can see the App Secret only in this window
After you click [Done] or close the window, you cannot view the App Secret again.
- The new App ID appears in the [Current] tab. The list shows the App name, App ID, Scope, and the issue date and time (ISSUED AT).
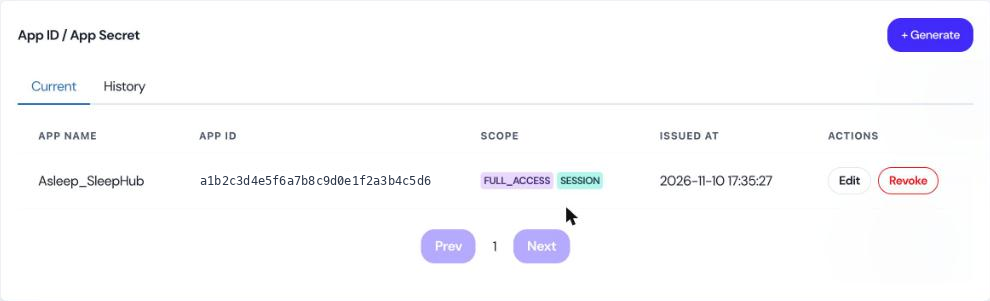
App ID list after creation
Ready to use immediatelyNo separate approval is required. As soon as you create an App ID, you can request tokens with its App ID and App Secret.
Change the App name
- In the [Current] tab, click the [Edit] button of the App ID you want to rename.
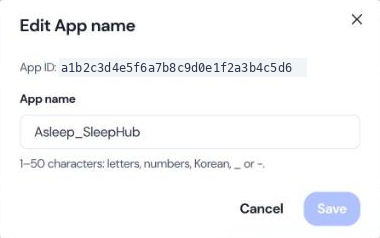
Edit App name window
- Enter the new App name and click [Save]. The input rules are the same as when creating the App ID.
You cannot change an App ID or its Scope. To use a different Scope, create a new App ID.
Revoke an App ID
An App ID that is no longer in use, or whose App Secret is suspected of having been exposed, should be revoked immediately for safety.
Revocation cannot be undone
- A revoked App ID (and the hubs registered to it) can no longer get new tokens.
- Tokens that were already issued remain valid until their validity period ends.
- Once an App ID is revoked, it can never be reactivated or restored.
Tip: Want to avoid service interruption? If you need to replace the App ID of a live service, we recommend creating a new App ID first, applying it to your system, and then revoking the old App ID.
How to Revoke
- In the App ID / App Secret block of Settings, click the [Revoke] button of the App ID you want to revoke in the [Current] tab.
Revoke button in the App ID list
- When the confirmation dialog appears, review the warnings and click the [Revoke] button.
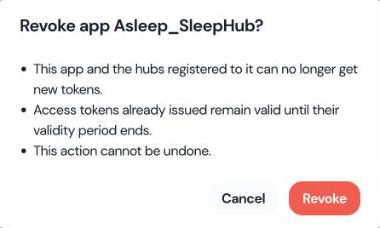
Revoke app confirmation dialog
- The revoked App ID disappears from the [Current] tab, and you can check its issue date and time (ISSUED AT) and revocation date and time (REVOKED AT) in the [History] tab.
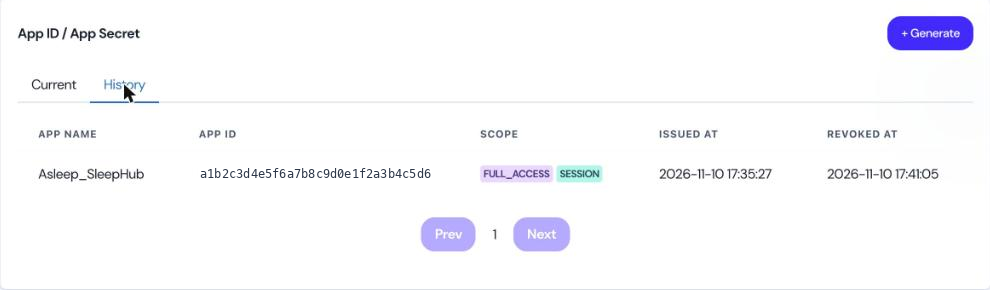
History tab
Notes when using with API Keys
- While at least one active App ID (in the [Current] tab) exists, you cannot revoke the last active API Key of each environment (Test / Live). The [Revoke] button of that key is disabled, and you must first create a new API Key in the same environment. For details, see Revoking an API Key.
Updated about 7 hours ago