Auto Tracking
Auto Tracking
To measure sleep with an app, users typically need to press the Start Sleep Tracking button before falling asleep. However, many users forget to press this button, causing them to miss out on sleep tracking. With AsleepTrack, sleep tracking can automatically start at a specific time or under certain conditions.
Android Auto Tracking
On Android, you can directly implement the auto-tracking feature within the app. You can check how to implement automatic tracking through the Sample App provided by Asleep.
1. Permission
For auto tracking on Android, the Overlay permission is required. To start recording via the microphone at a specific time for automatic sleep tracking, you need the FOREGROUND_SERVICE permission.
For Android 12 (API level 31) and above, you must grant the Alarms & reminders permission to ensure precise alarms for starting auto tracking at the correct time.
After launching the app, microphone usage permission and push notification permission should be granted in advance.
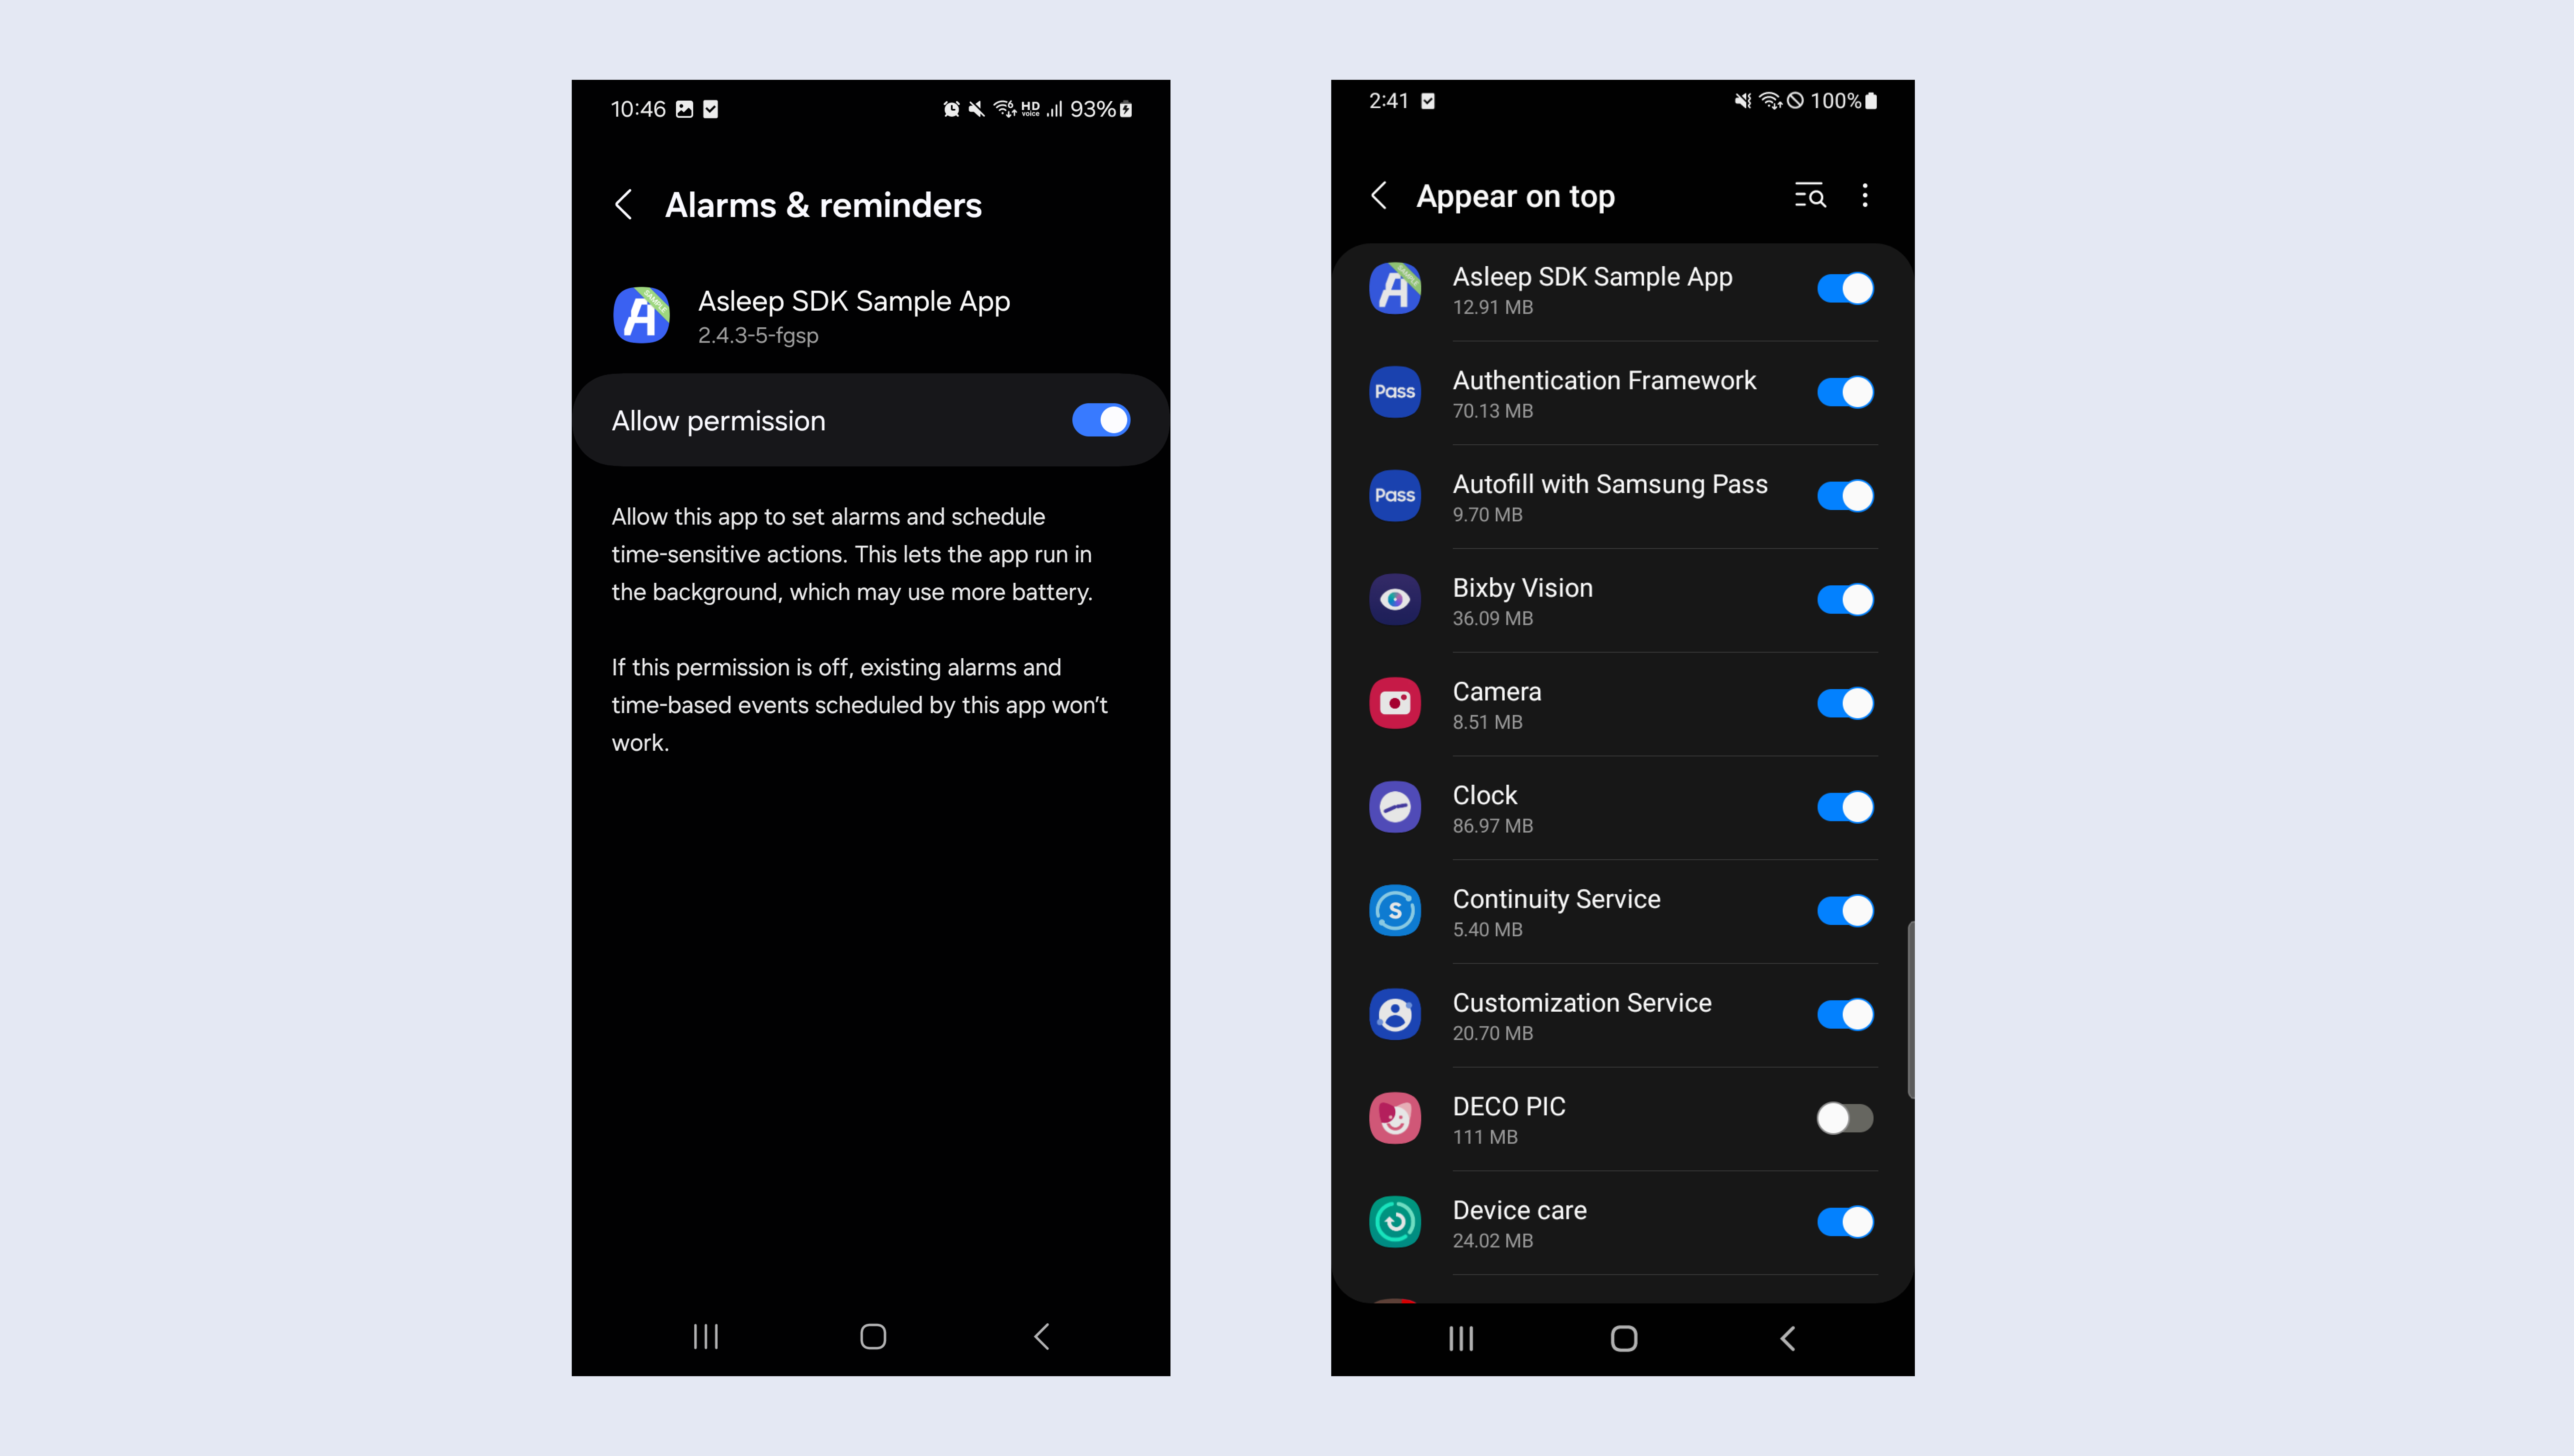
2. Auto Tracking UX/UI
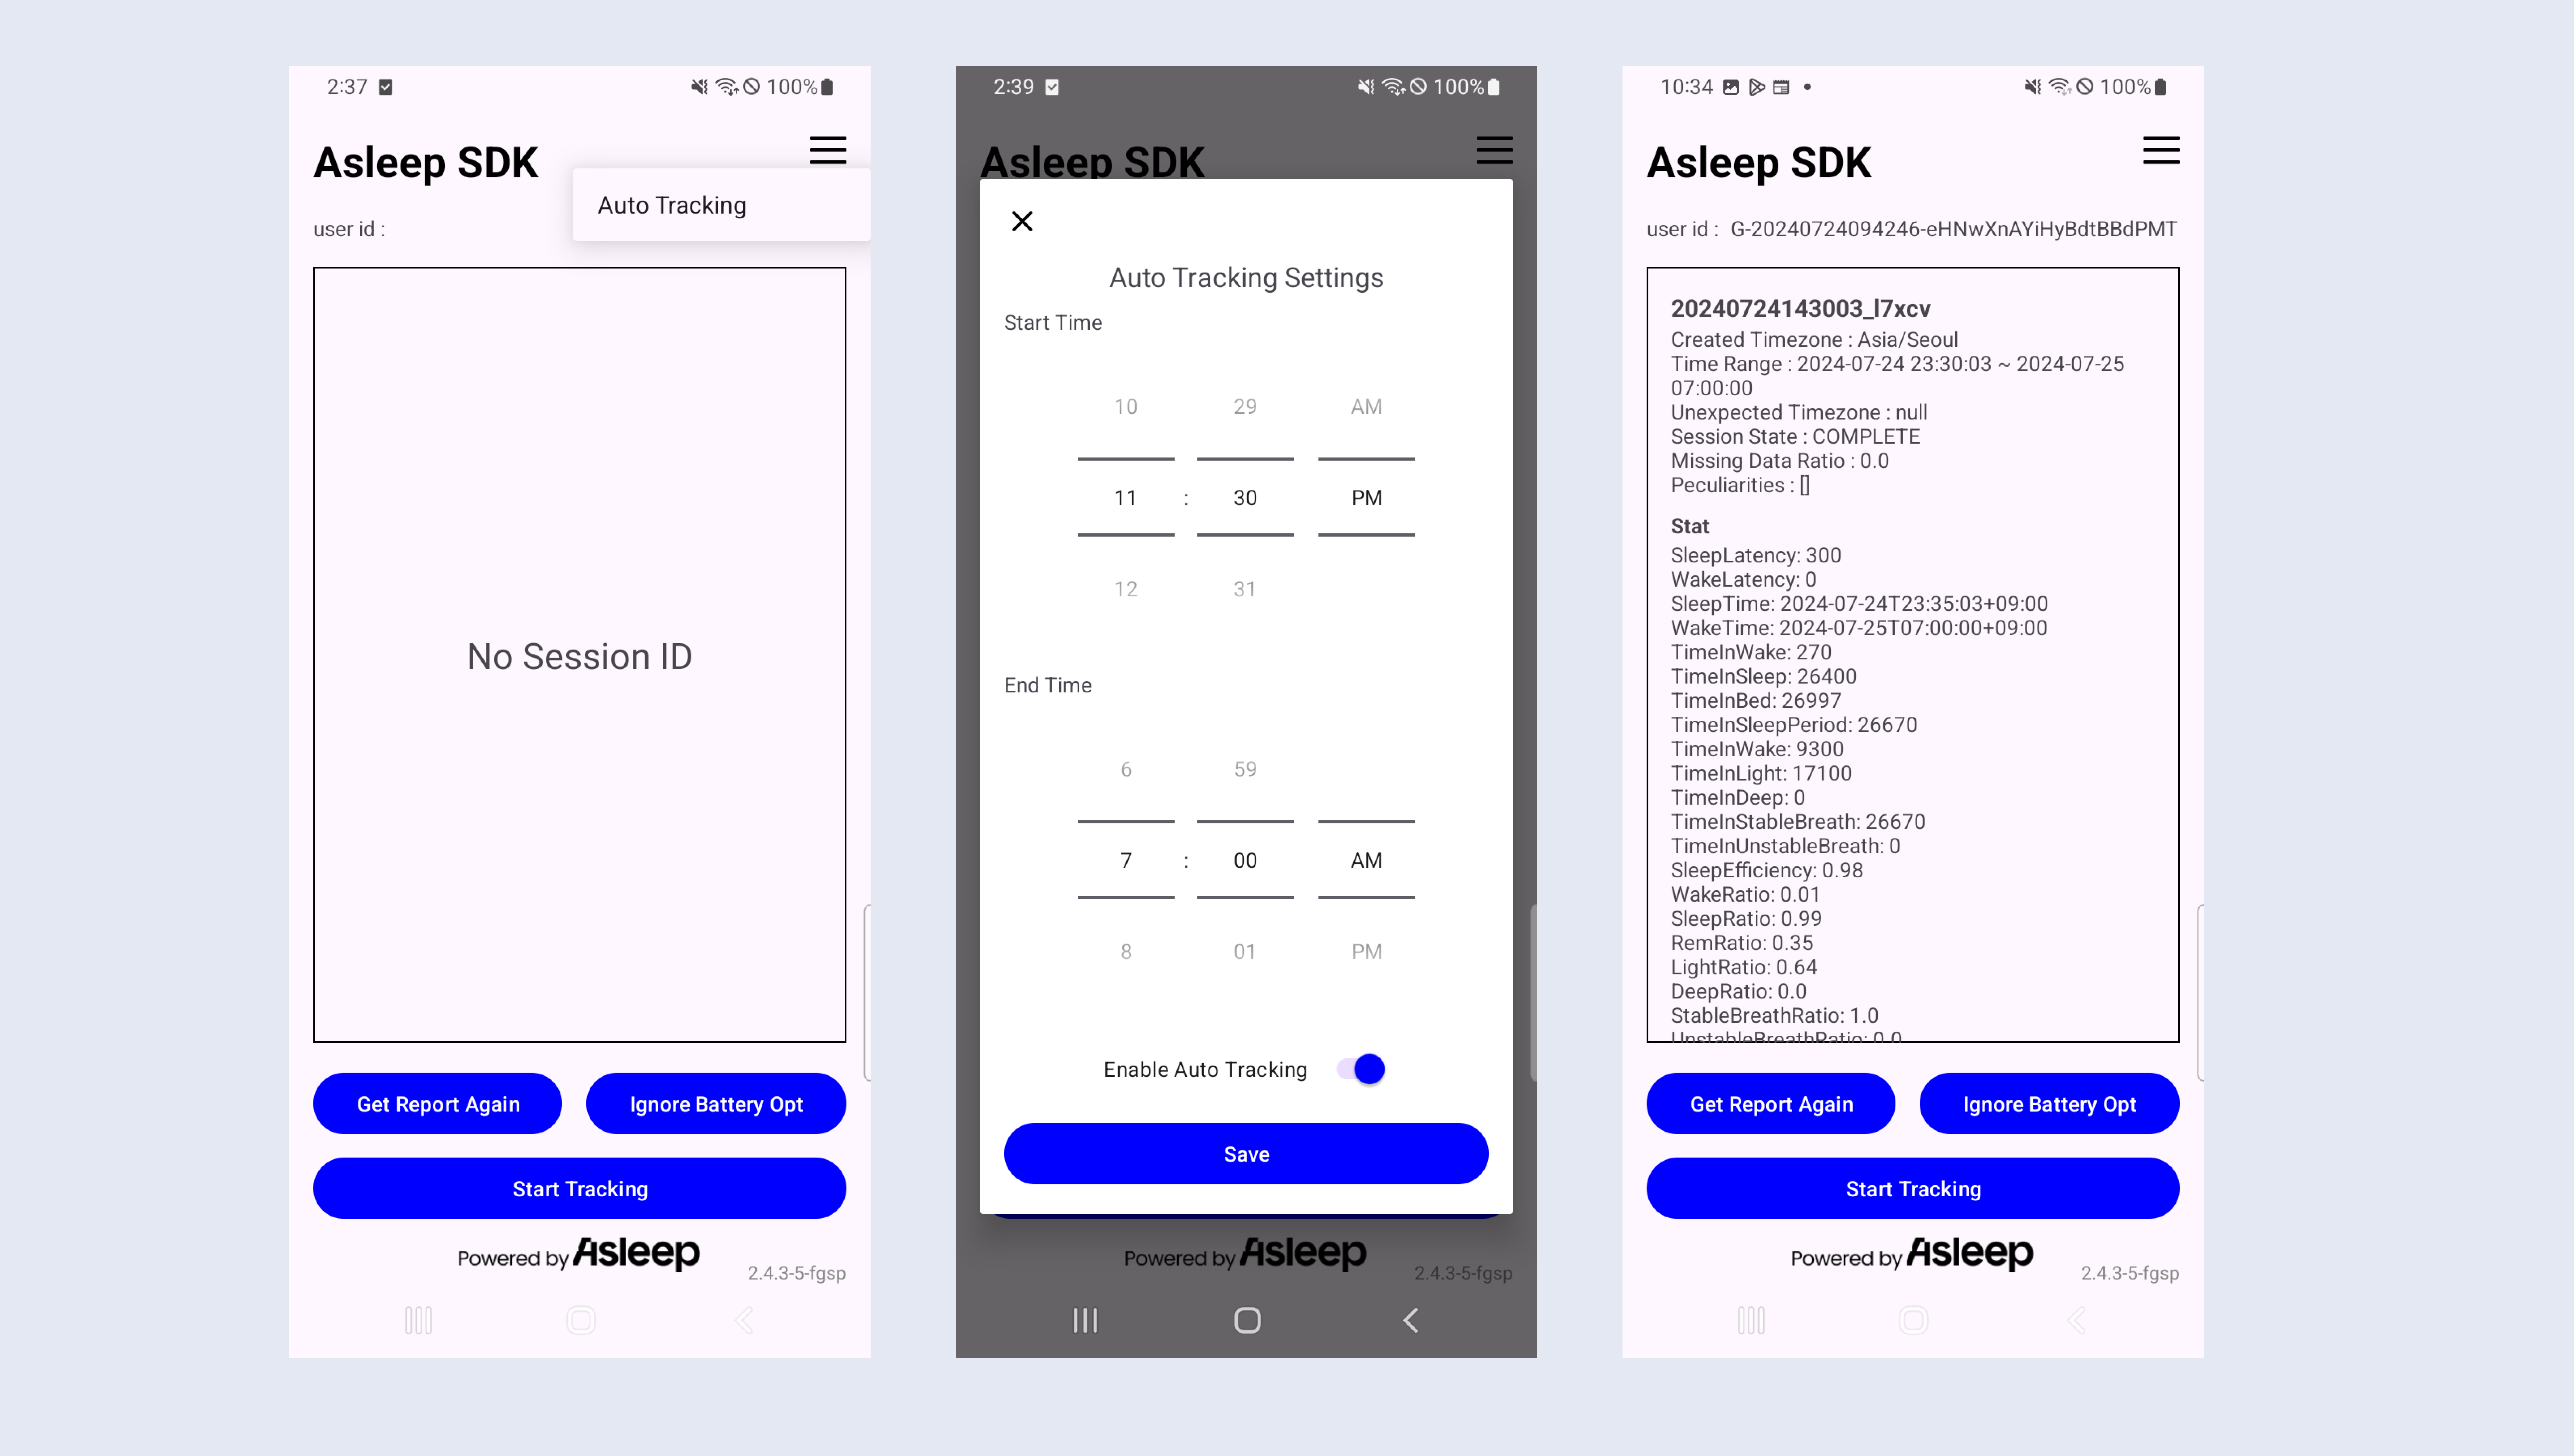
You can check the sample code for auto tracking UX/UI through the Sample App provided by Asleep. You can set up the auto tracking schedule through the Auto Tracking item in the top right corner of the app.
Select the start and end times for tracking, then set Auto Tracking to Enable and press the Save button. At this time, the alarm time is registered through the AlarmManager’s setExactAndAllowWhileIdle method.
When the tracking start time arrives, the app runs automatically in the background, a notification icon is created, and the microphone is shown as being in use. When the tracking end time arrives, a report is generated and displayed on the screen.
iOS Auto Tracking
Unlike Android, iOS requires users to manually register automation using the Shortcuts app’s Automation feature to enable auto tracking. To facilitate this, you need to implement the App intent for sleep tracking. You can check how to implement the App intent through the Sample App provided by Asleep.
1. Shortcuts app
The Shortcuts app, available since iOS 12, is a built-in app that allows users to set up personalized Automations based on various conditions. Through the Automation feature, you can start sleep tracking at a specific time or use various triggers supported by the Shortcuts app (e.g., Sleep Mode, WiFi connection, etc.) to start sleep tracking.
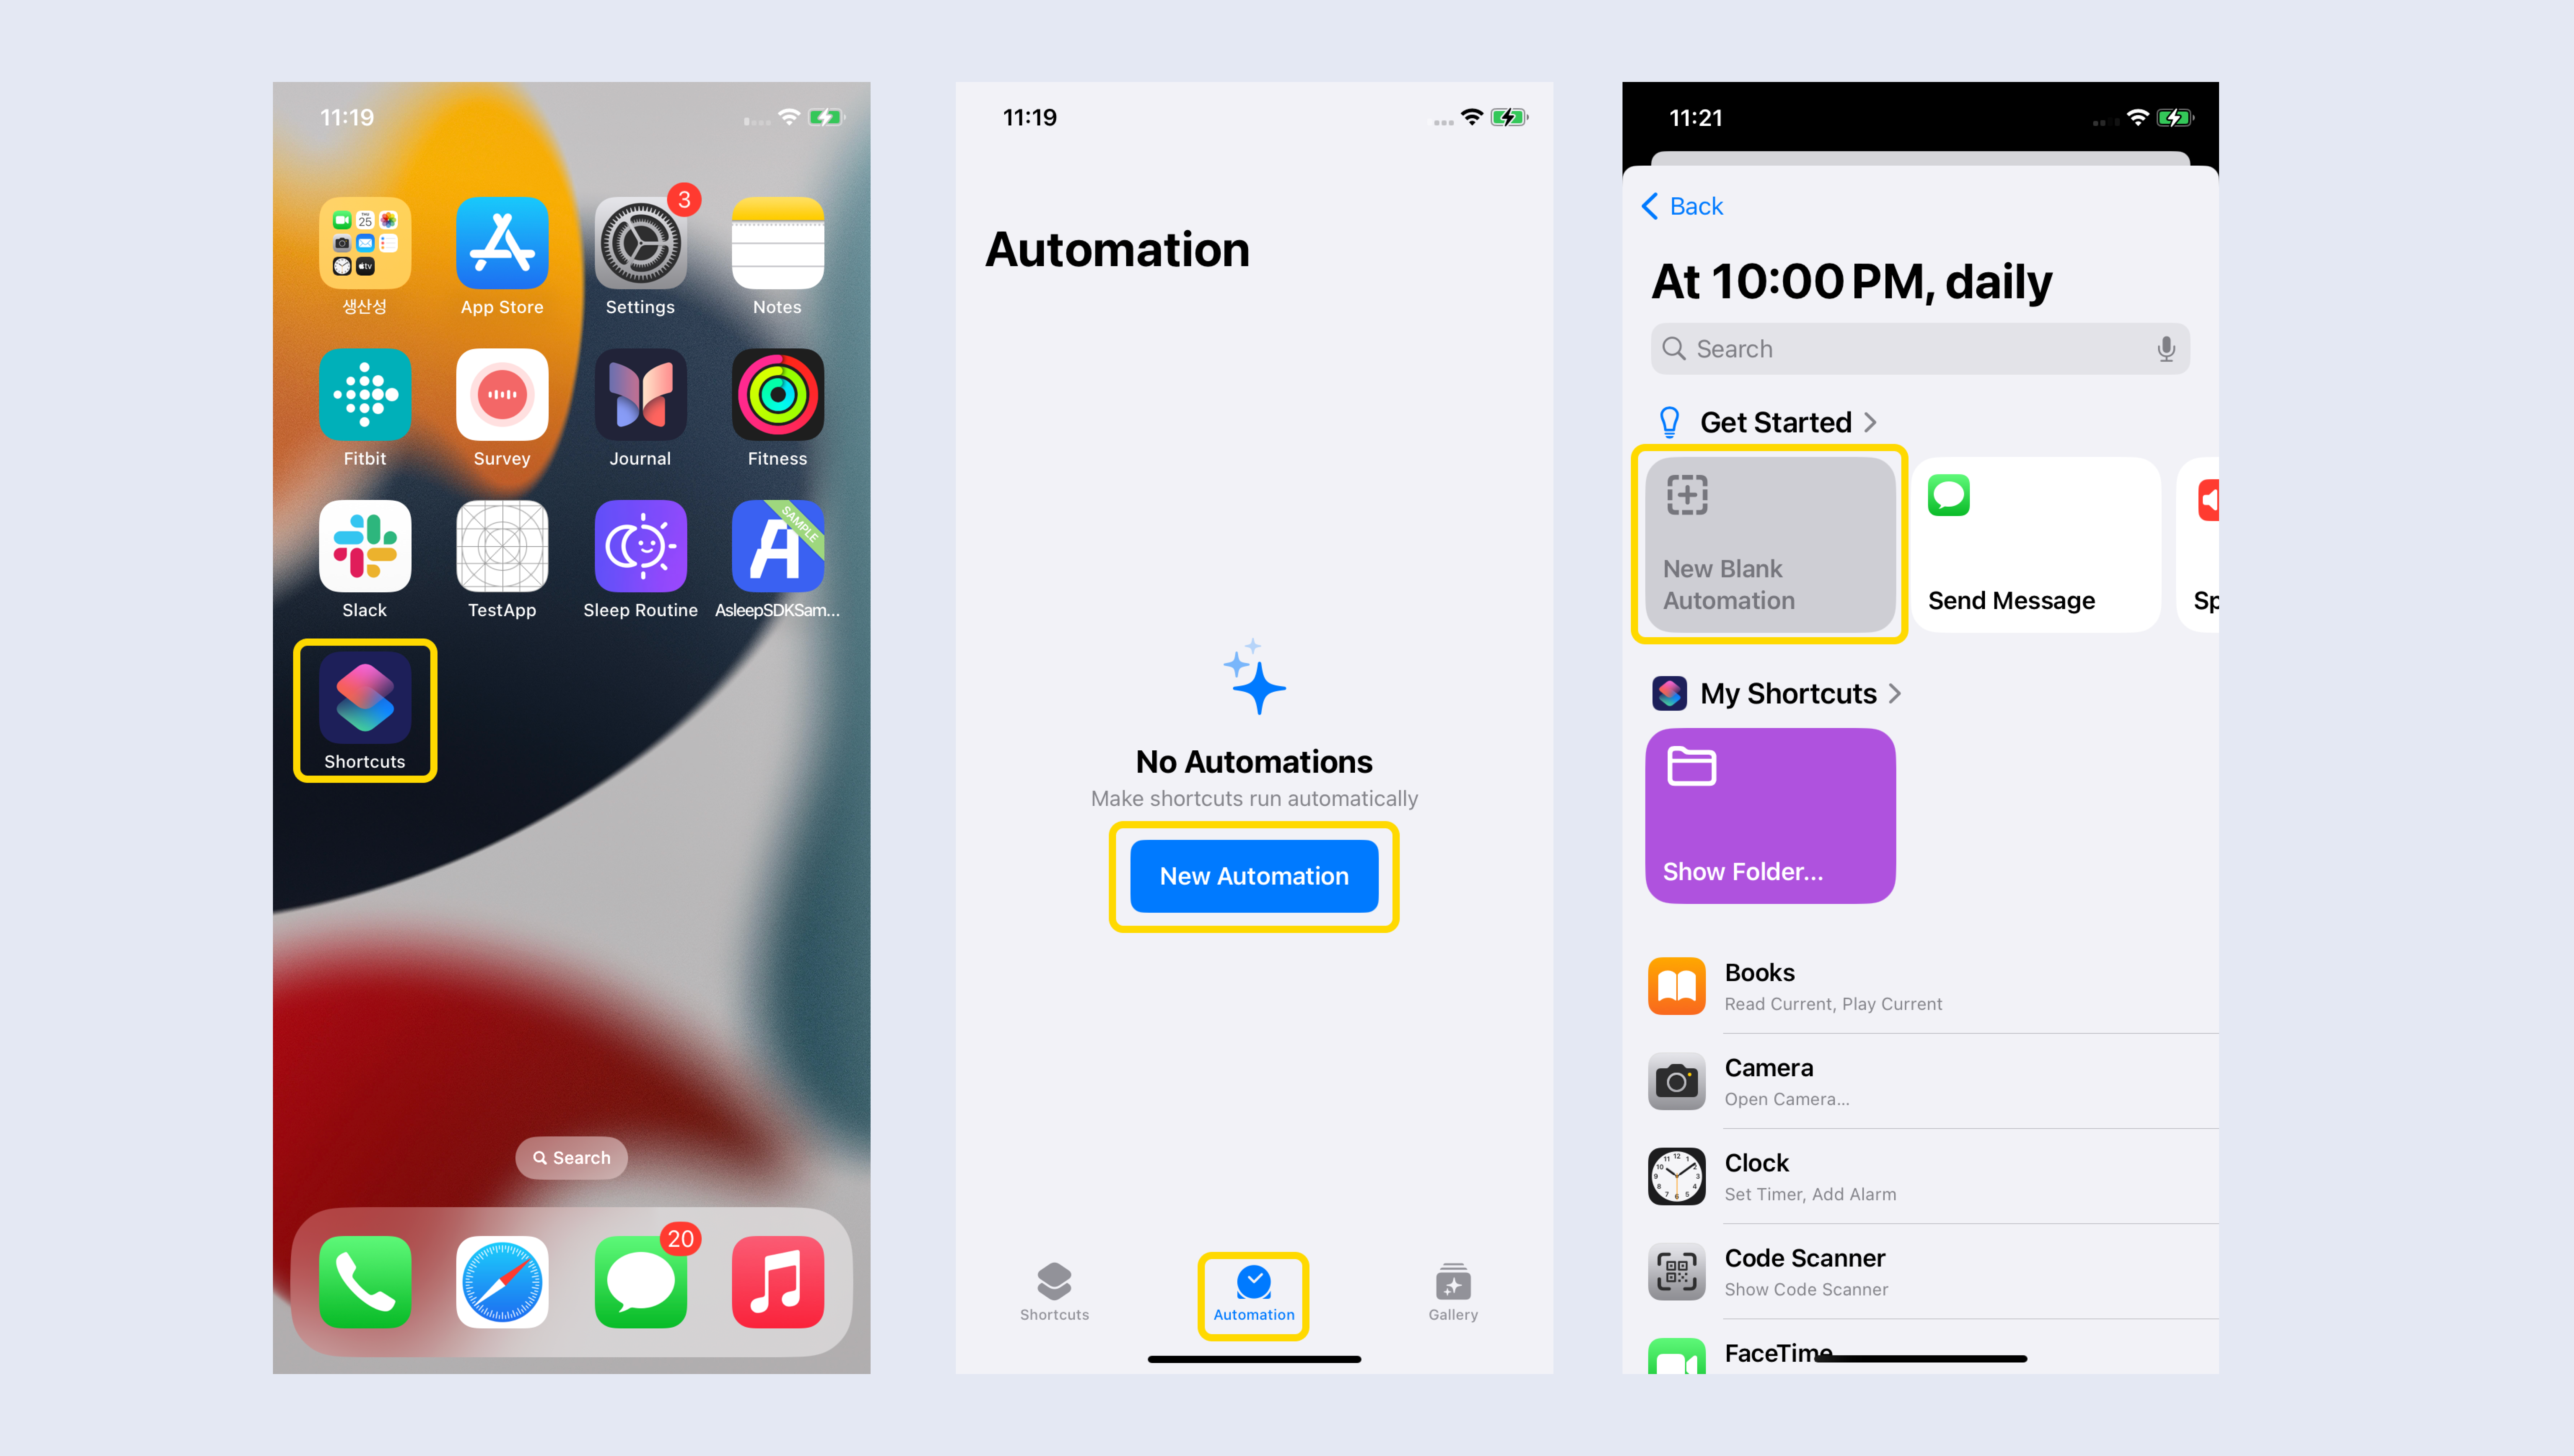
2. Sleep tracking start automation
Once you have selected the trigger to start sleep tracking, you need to register the sleep tracking start App Intent in the automation. First, use Open App to launch the app that integrates AsleepTrack, then register the sleep tracking start App Intent.
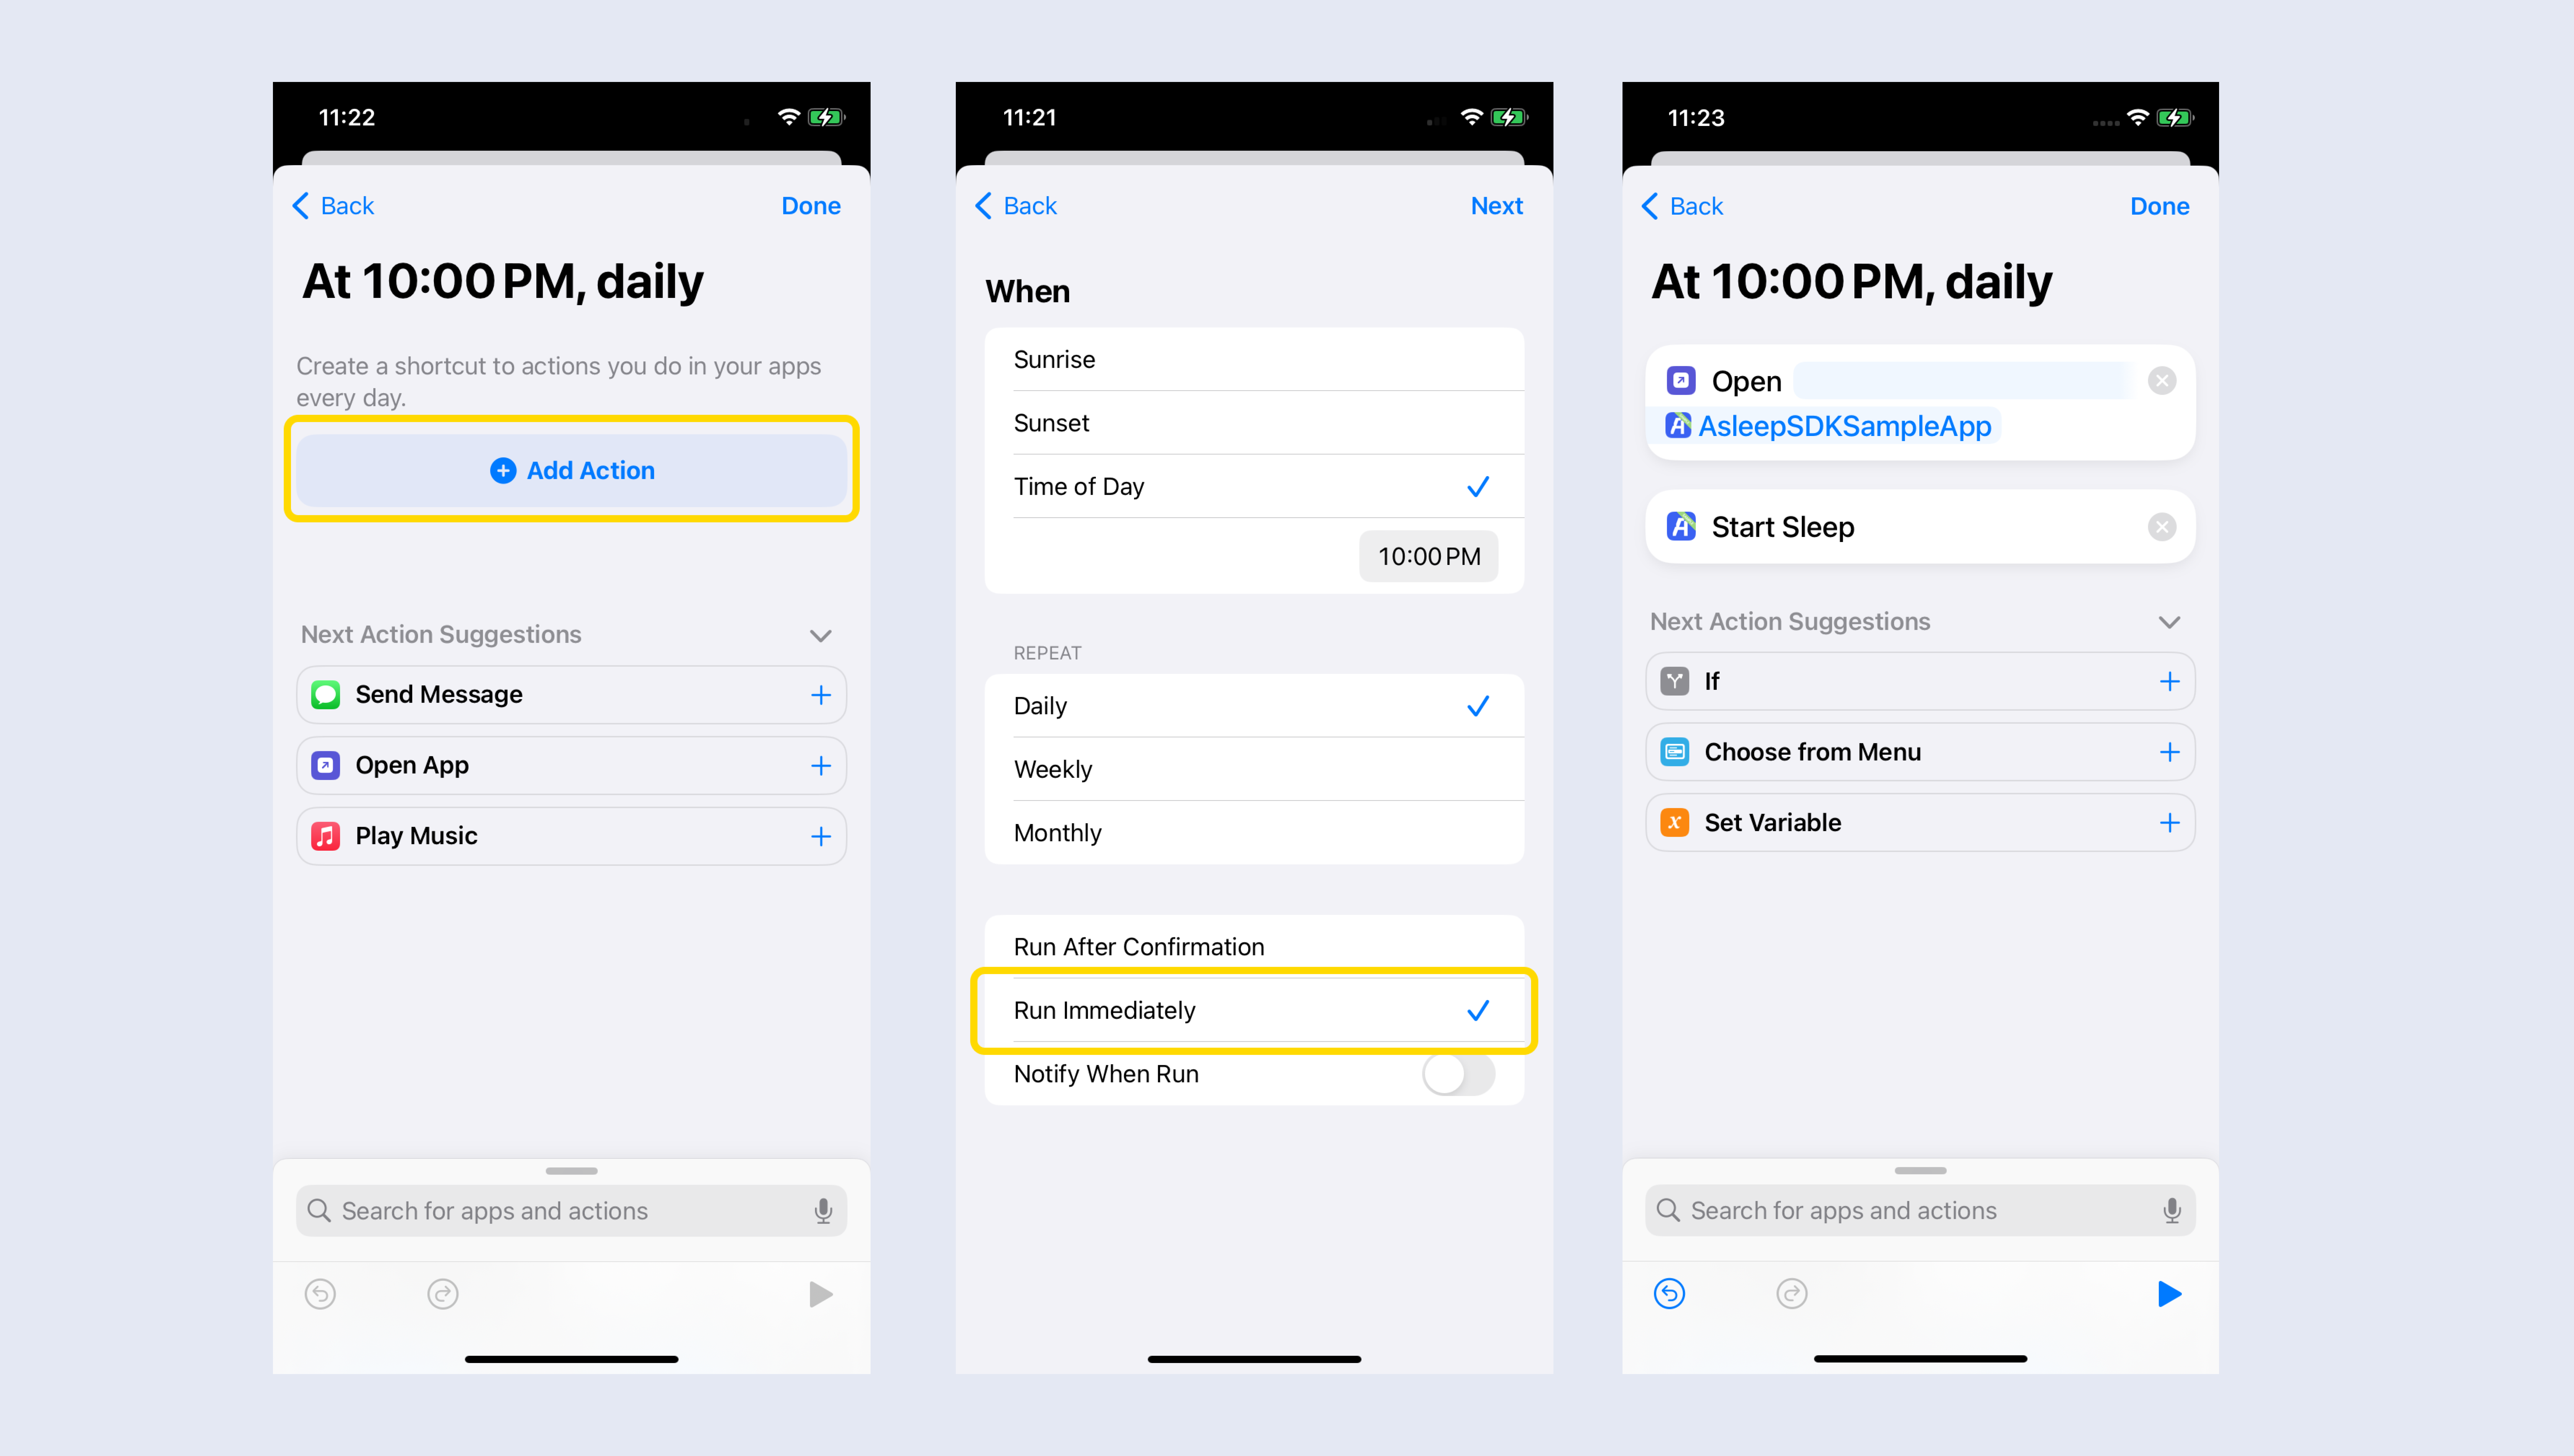
3. Sleep tracking stop automation
Just like starting sleep tracking, ending sleep tracking can also be registered for automation. Register the sleep tracking end App Intent in the automation.
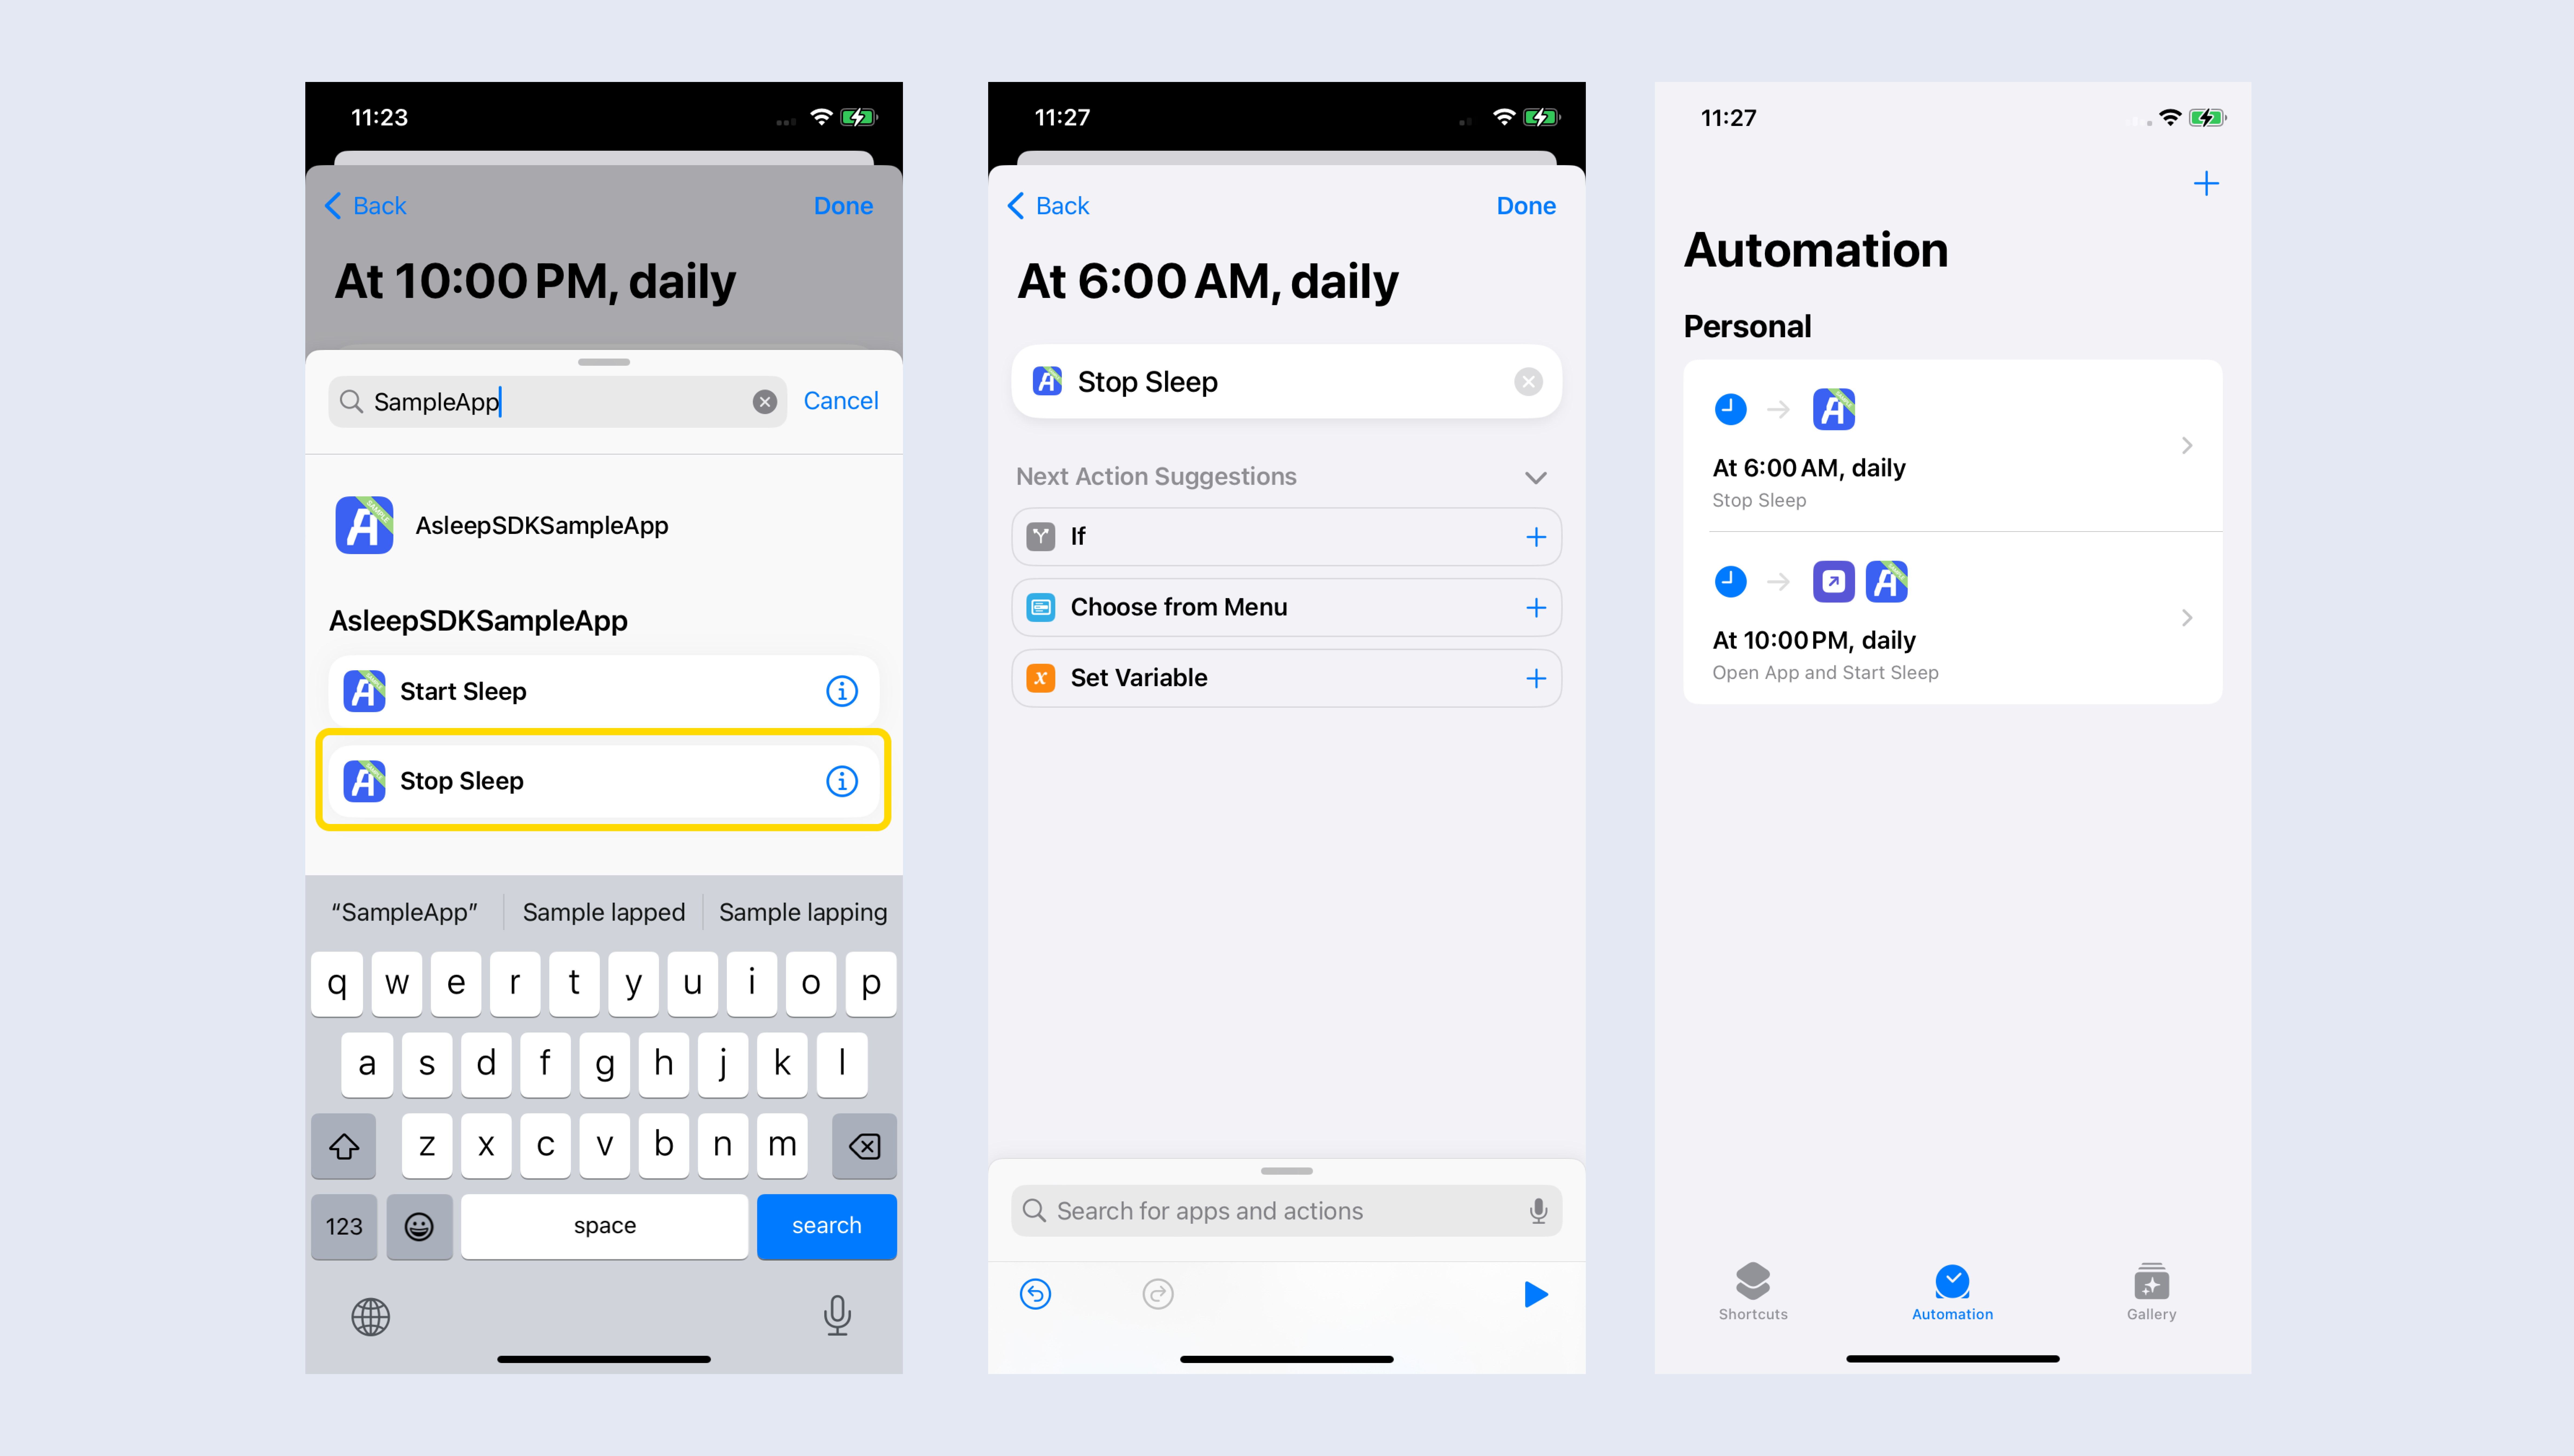
4. Auto Tracking
When the start time for tracking arrives, the app will automatically open and begin sleep tracking. However, if the phone is locked, a modal will appear asking for confirmation to run the automation. The automation will proceed once the user accepts.
Updated 5 months ago
